In Hackaday, we saw various projects, some of which were based on deep-seated needs or unsolvable problems. Others were born from the world of “why not”, and perhaps it is these projects that bring the biggest smiles on our faces.this Wide boy forward [Elliot] Retro Future is such a project.
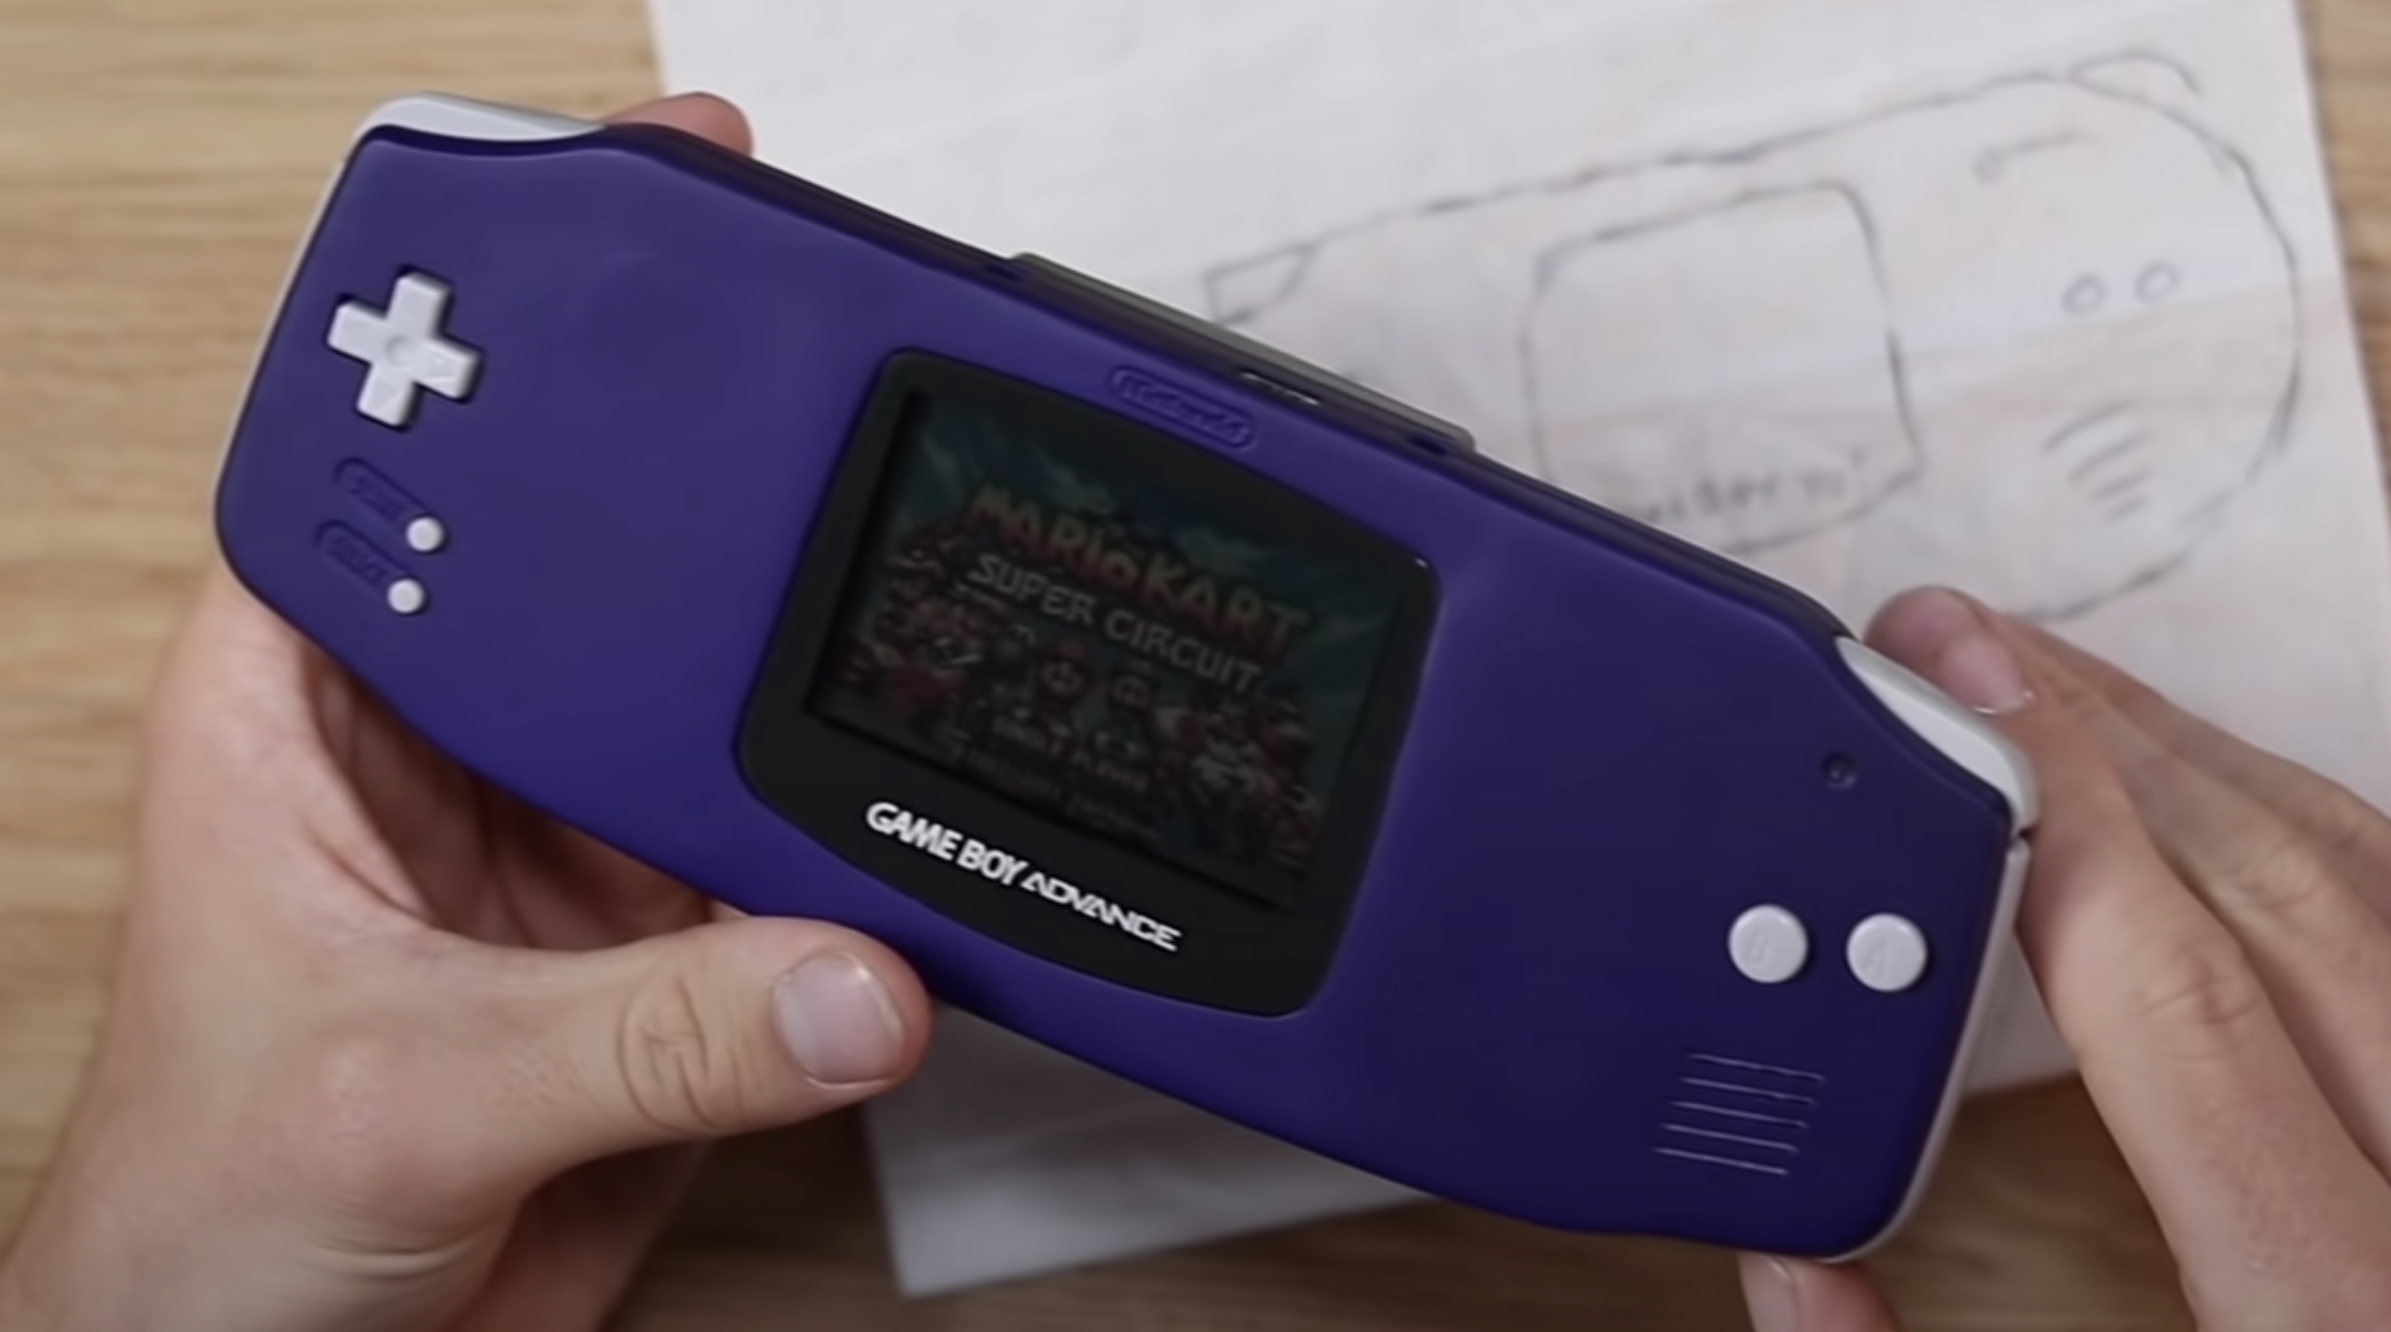
Starting with a working Game Boy Advance and a donor with a damaged motherboard, Frankenstein can begin. Dremel splits one box in half, then removes the side of the other box, and reliable old car body filler helps to fill and smooth the gap. A particularly clever trick is to use Dremel to create channels for the filling to make it easier to adhere. Several areas must be constructed with fillers and glued with plastic sheets as the base. As you can see in the video below, countless hours of sanding, primer, sanding and more primers resulted in a very smooth surface. The choice of purple paint really gives the impression of a fresh Game Boy Advance from the factory.
The working circuit board is desoldered and the donor board is cut into pieces to fit the extended side. Use some enameled wires to bridge the connection to the original motherboard through test points on the PCB. [Elliot] There is no choice to replace the screen with an IPS display or add a backlight. These quality of life improvements are good, but Nintendo has not done it. The goal is to make users wonder, even if only for a second, what if Nintendo happened to create such a generous one-time handheld gaming opportunity.
[Elliot] It was made only because he found it interesting and liked the form of the things he made. Is this a hacker? Is it art? There may be a little bit of both. This is not the first time he has modified a Nintendo handheld.He made one before Long Nintendo Gameboy DMG-01. We like to see all the crazy modifications and adjustments made to the Game Boy series, such as the Game Boy Color in DMG-01.